(
Note: Procedures 1 to 3 are VERY important and addressed to Windows Vista/7
users. However, if you have UAC off and you’re running and administrator
account, you can skip them )
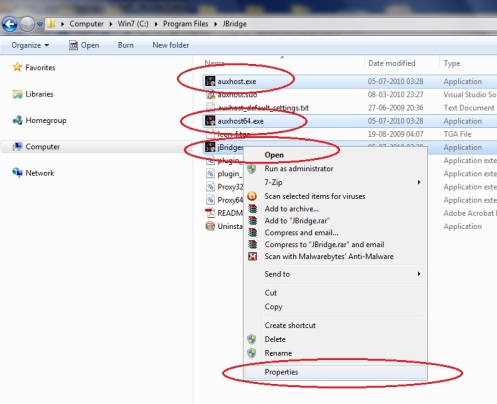
1 - After the installation, locate your jBridge installation folder.

2 - For auxhost.exe, auxhost64.exe and jBridger.exe, right-click them
and enable the "Run this program as an administrator" option
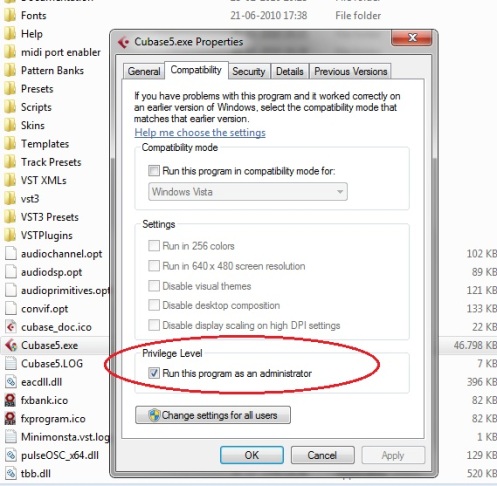
3 - Do the same for the VST host you'll be using.

4 - Now run the jBridger tool and select the VST host type you'll be
using ( it's up to you to decide if you want to use a 32bit or 64bit VST
host ).
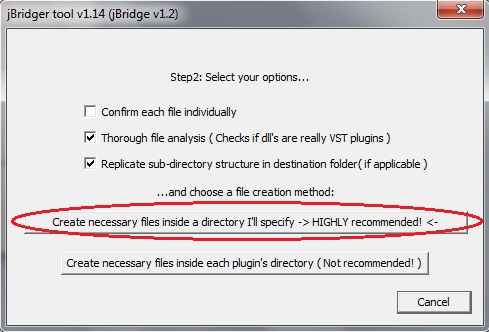
5 - The standard options should work for most plugins, however, you can
try disabling the "Thorough file analysis" option if for some reason the
tool is unable to create bridging files for the desired plugin.
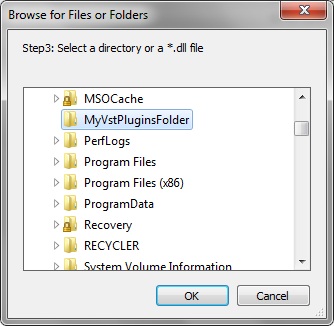
6 - Now select the directory which contains the plugins you want to
bridge (You can also select a single plugin if you wish).
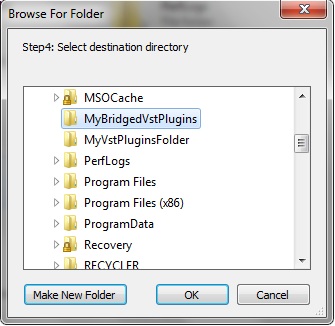
7 - Now select the folder where you wish to place the bridging files (
This step will only appear if you selected the option marked in red in
picture 5, as recommended ).
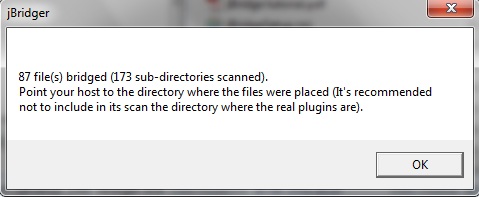
8 - Once the jBridger tool analysis is completed, you should see a
dialog similar to this one.
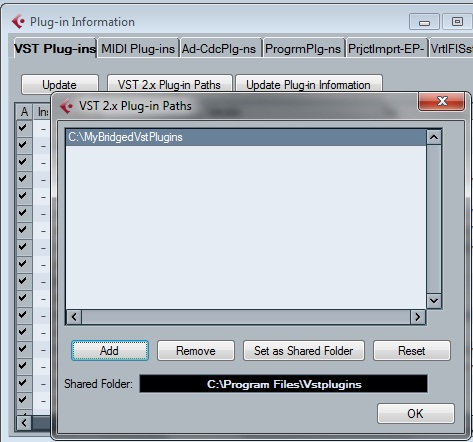
9 - Finally, in your main VST host, add the path where the bridging
files are to its scan path(s). This step will vary from host to host, so
please consult the proper documentation, if you're unsure of how to do
this.

